Do you know that you can make homemade miso from scratch with only 3 ingredients?
In this article, we will explain an easy yet detailed way to make miso with video instruction. This recipe is an instruction from the Japanese miso manufacturer summarized by Kawashimaya. Use it as a reference on making homemade or even restaurant scale miso.
Making miso is easy, fun, and hard to mess up! (that is, if you stick to the basic technique).
Enjoy making delicious Japanese miso!
What is Miso?
Miso (みそ or 味噌) is a traditional Japanese seasoning produced by fermenting soybeans with salt and koji (steamed grains that have been inoculated with koji mold or Aspergillus oryzae). Miso is sometimes also made with rice, barley, or other ingredients, thus making various types of miso.
This umami ingredient-rich seasoning has a thick paste-like consistency. Typically, miso is salty and has a natural sweetness from the koji, but its flavor and aroma depend on various ingredients and fermentation processes.
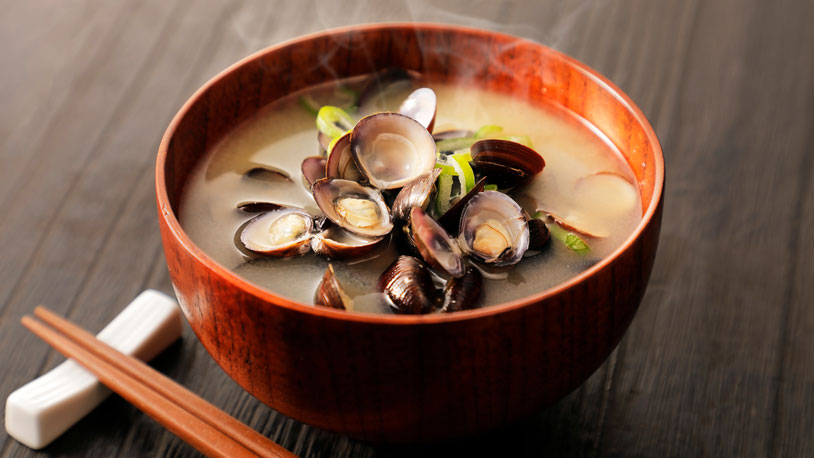
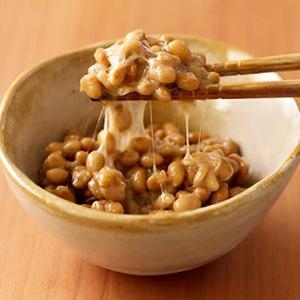
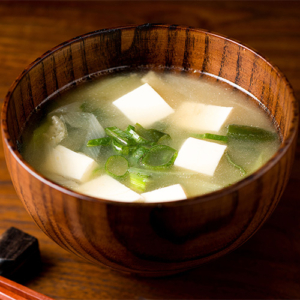
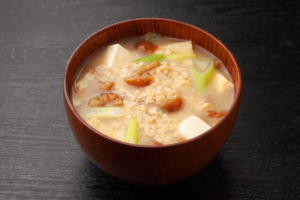
Miso is essential for many Japanese food dishes. For example, it is the key ingredient to make miso soup (misoshiru, 味噌汁), a soup dish from miso paste and dashi stock with tofu or wakame seaweed. In addition, miso paste is also irreplaceable when making miso ramen, miso-marinated salmon, etc. A must-have seasoning to have in a Japanese pantry!
Furthermore, miso is rich in vitamins, minerals, and low in calories. This article will guide you to make miso paste, but feel free to learn about miso from our articles below!
How to Make Miso
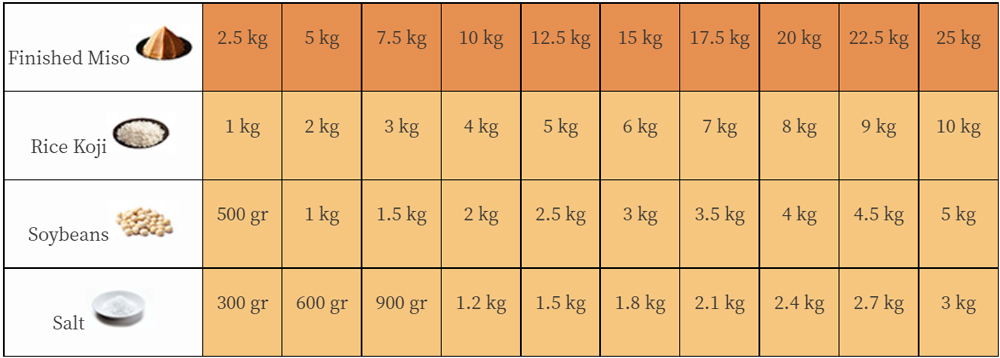
Ingredients (For approx. 2,5kg portions)
◦Soybeans: 500 grams /17.6oz
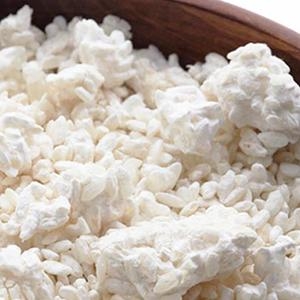
◦Dried Rice Koji: 1 kg /35.2oz
(In case of mixed miso or Awase miso, use 500 gr of rice koji and 500 gr of barley koji). ※You can also use raw malt/koji.
◦Salt: 300 grams /10.5oz
Required Tools
◦Pressure cooker (or stock pot)
◦Plastic bag
◦Bowl
◦Preparation container (container/vessel that has zipper/fastener)
In order to avoid the propagation of germs, let’s wash the tools clean and properly. Use alcohol like shochu to clean the container if necessary.
The Amount of Miso That Can Be Made and the Amount of Ingredients Used
Steps to Make Miso
There are eight steps in the miso-making process:
| 1 Day Before | 1. Wash the soybeans. 2. Soak the soybeans in the water. |
| Preparation Day | 3. Boil the soybeans. 4. Mash the soybeans. 5. Mix the malt/koji and salt. 6. Add mashed soybean in the mixed koji and salt. 7. Roll the mixed soybean from step 6 into a round/ball form, then put it in the container. |
| Fermentation Period | 8. Let it ferment for about 10 months-12 months. |

How to Make Miso
Equipment
- 1 Pressure Cooker (Stock Pot)
- 1 Plastic bag
- 1 Bowl
- 1 Preparation container (container/vessel that has zipper/fastener seal)
Ingredients
- 500 g Soybeans (17.6oz)
- 1 kg Dried Rice Koji (35.2oz) In case of mixed miso or Awase miso, use half rice koji and half barley koji. ※You can also use raw malt/koji.
- 300 g Salt (10.5oz)
Instructions
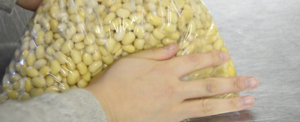
Step ① Wash the soybeans
- Put the soybeans into a bowl, then wash and rub the soybeans thoroughly in water to clean off any dirt. Be careful not to break the skin while washing the soybeans.
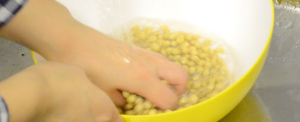
- Soil and dirt on the unwashed soybeans have tons of microorganisms that will negatively impact the process when making miso. Make sure to do this thoroughly.
Step ② Soak the soybeans in the water (for 18 hours)
- Soak the washed soybeans in clean water about four times more than the soybean weight (for 500g/17.6oz of soybeans, use 2 liters/67 fl oz of water) for 18 hours.
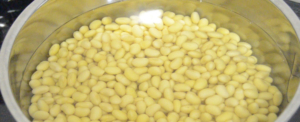
- The soybeans will get about two times bigger after being soaked in the water. So, please prepare a bowl that is big enough.
- If the soybeans are not soaked enough and have a hard core inside, the beans wonʼt cook evenly. Make sure to soak the beans in plenty of time.
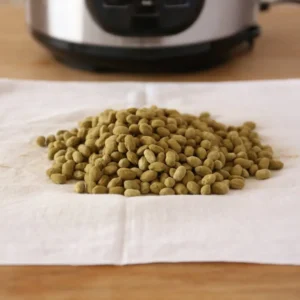
Step ③ Boil the soybeans
- Please boil the soybeans with a pressure cooker or in a pot. Use new freshwater to boil the soybeans.
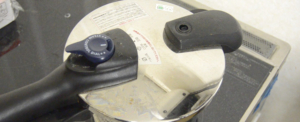
- If you use a pressure cooker, boil them for about 20-30 minutes. If you use a regular pot, cook them for about 3 hours.
- Boil the soybeans until they reach the softness of easily squeezed with thumb and index finger. Be cautious to the heat when checking the softness of the soybeans.
Step ④ Mash the soybeans
- Pour out the boiling water and put the beans into a plastic bag while itʼs hot. Mash the beans by using your hands. It doesnʼt has to be mashed to a complete paste form. The remaining few whole beans wonʼt be a problem.
- Be careful not to burn yourself. Using a glove might help if it is too hot.
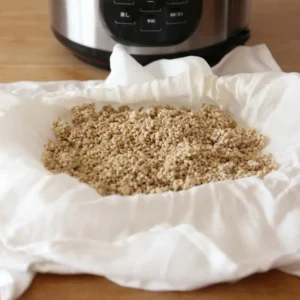
Step ⑤ Mix the malt/koji and salt
- Add koji and salt in a container, then mix thoroughly. The koji and salt mixture is called “Shiokiri Koji.”
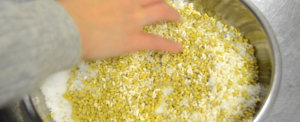
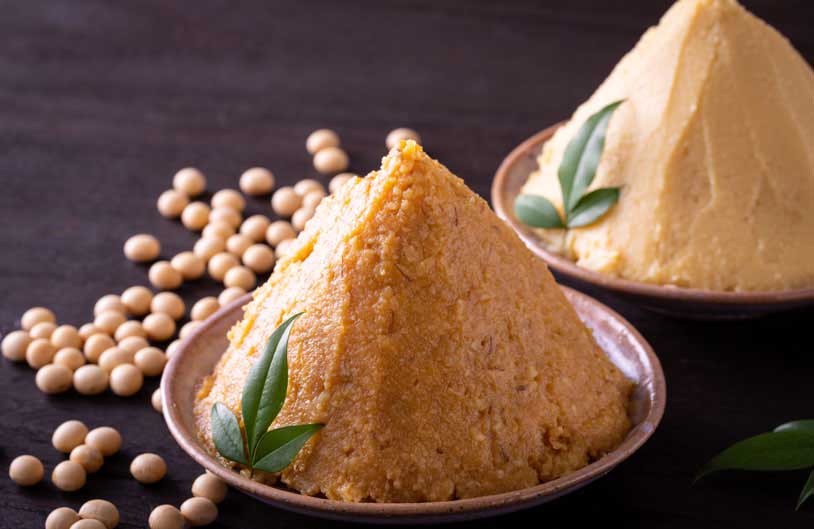
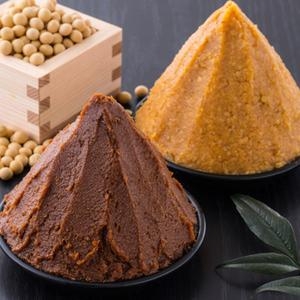
- In this step, if you use 50% rice koji and 50% barley koji (as we did in this recipe), you’ll make Mixed/Awase Miso, which has the best, good balance of sweetness. Meanwhile, If you use 100% rice koji, you’ll make Rice Miso. When using 100% barley koji, you’ll make Barley Miso. Lastly, if you use 100% brown rice koji, you’ll make Brown Rice Miso with the unique taste of brown rice.
- ※You can also use raw koji (fresh koji) or dried koji in your preference. In this recipe, we are using dried koji.
Step ⑥ Add mashed soybean in the mixed koji and salt
- To prevent mold growth, mix the three ingredients, soybeans, malt, and salt, carefully and thoroughly. Mix it when the soybeans are warm (not hot) because the koji could lose its fermentation ability at high temperatures.
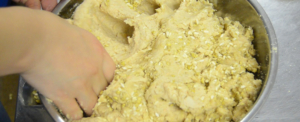
- Usually, it is not necessary to add water. However, if the Miso is dry or hard to mix, you can add some water until it has a softness like an ear lobe.
Step ⑦ Roll the mixed soybean from the previous step into a round/ball form, then put it in the container
- To remove the air from the mixture, form the ingredient mix from previous step into small balls. Then place each ball into the container and press it by fist each time to fill a gap between the balls.
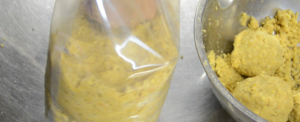
- Because molds can grow within the air gap in the container, please fill it firmly, so there’s no air gap.
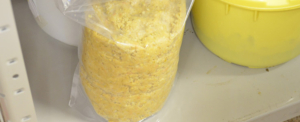
- At Kawashimaya, we use preparation plastic pouch with a fastener which can be used for preparation and to keep the miso once it is done. Turn the container (plastic bag) upside down, let the air out, and zip it. If you use enameled metalware or a wooden container, please cover it with plastic wrap (clinging to the miso) to prevent it from touching the open air.
Step ⑧ Let it ferment for about 10 months-12 months
- Keep the prepared miso in a cool dark place and avoid direct sunlight. Do not store it in the fridge as fermentation proceeds in Summer.
- After ages 10 months-12 months or more, tasty miso is ready. Please keep it refrigerated along with the container. You can keep the finished homemade miso for more than 1 year.
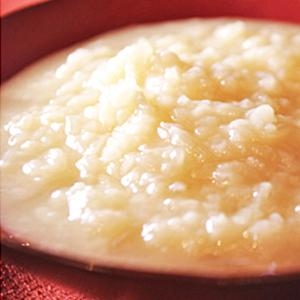
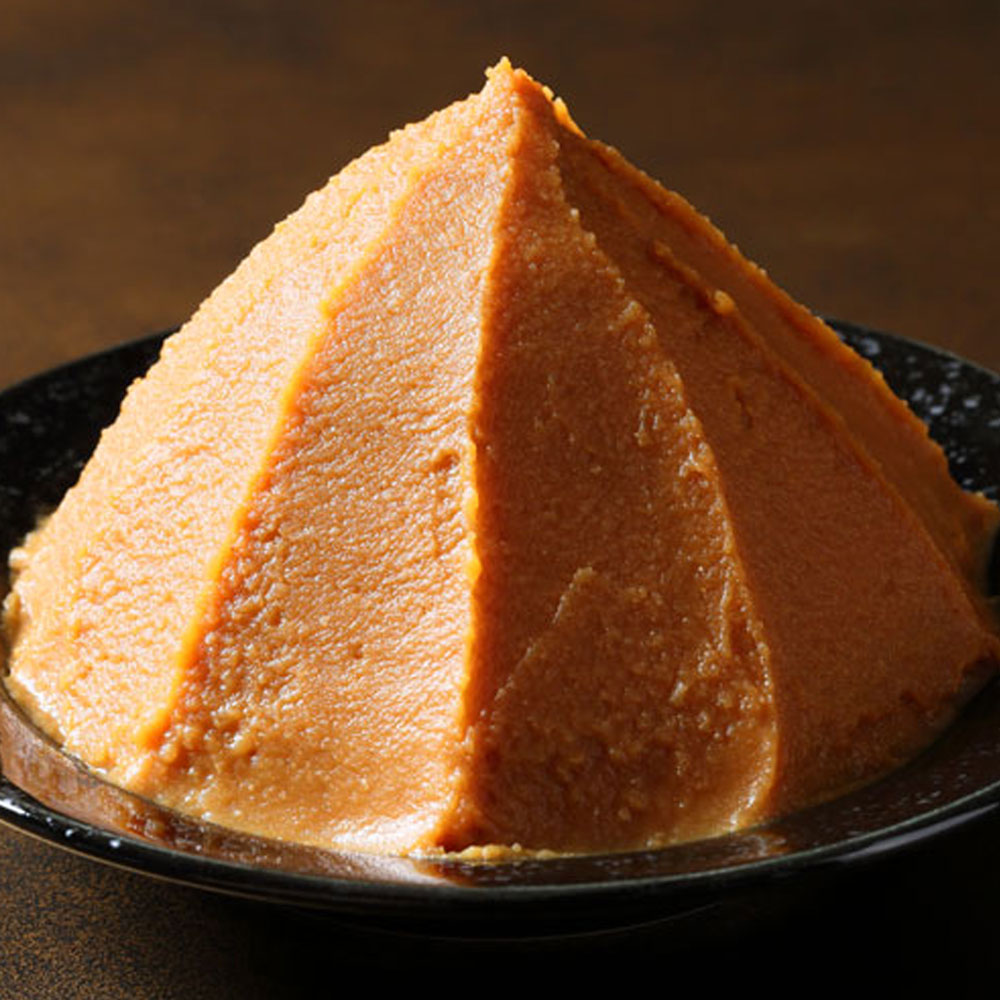
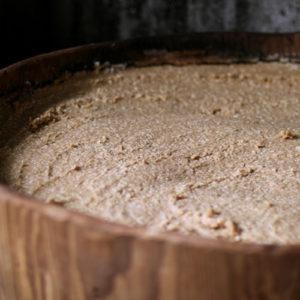
The Miso is Ready After 10 Months
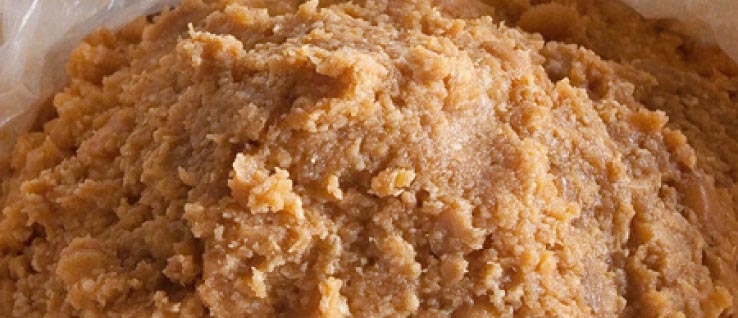
After natural fermentation for 10 months, our miso is ready as shown in the picture above. The color is deep brown and the taste is mellow. The texture is just a bit chunky because the soybeans are only half crushed. If you prefer a soft texture, please fully mashed the soybeans.
Molds may grow on the surface of the miso after the miso is finished or during the fermentation process. If that happens, scrap the surface where the molds grow. The miso is still edible, so please do not worry and enjoy.
Please enjoy the unpasteurized homemade miso paste that is carefully fermented and made without additives. Homemade miso offers an extraordinary taste and health benefits you can’t get from those sold in grocery stores.
Recommended Handmade Miso Kit
How to Store Homemade Miso
After the miso reaches your desired color and taste, store it in the refrigerator to prevent further fermentation. Homemade miso can be consumed for more than one year if stored in the fridge.
If you continue to put the miso in a cool dark place, the fermentation will continue. The longer the fermentation, the miso’s taste will become richer, and the color will darken. But when it is fermented for more than two years, it will have a strong smell, less sweetness, and sourness due to lactic acid fermentation. When preparing miso, please monitor the taste and store it in the refrigerator at your most preferred flavor and color.
Best Time to Make Miso
The best time to make miso is during the cold seasons. In Japan, it is from late January to February (Winter). The miso prepared and matured during this time is called “Kanjikomi.” If prepared during Winter, the miso will be fully matured after 10-12 months, so you can enjoy the miso in October or November in the same year.
The miso made in January (Japan) will go through the fermentation process and be aged with the guideline below:
- April (4 months): miso with yellow color
- July (7 months): miso with bright golden yellow color
- September (9 months): miso with brown, tawny color
- December (12 months): red miso
Meanwhile, if you start making miso in Summer, the time needed for fermentation until it’s appropriately fermented is 4-5 months.
The homemade miso made in Winter is aged slowly with the natural fermentation method compared to ones made in Summer. The chance of mold contamination will also be lower as the humidity is very low. Thus, it will have a deeper, richer flavor with more umami.
Even though you can start to make miso every time throughout the year, we recommend starting in Winter. Please choose the timing when the temperature starts to drop in your country to make miso.
Frequently Asked Questions
- How is miso made? Can I make miso from scratch at home?
-
Miso is made by mixing mashed boiled soybeans with koji (steamed grains that have been inoculated with Aspergillus oryzae or koji mold) and salt. This mixture is then fermented for 10-12 months (the longer the fermentation, the richer and tastier the miso will be.) Everyone can make homemade miso from scratch with easy steps using only soybeans, koji, and salt.
- Does homemade miso go bad?
-
If you keep the homemade miso in the refrigerator, the fermentation will stop, and it does not go bad in a long time. Miso’s quality remains consistent for more than one year if stored in the refrigerator.
- Is it okay to use the water used for soaking the soybeans to boil them?
-
Please use new freshwater to boil the soybeans.
Even though the soybeans looked clean, there might be dust and microorganisms on them. Therefore, when boiling the beans, we recommend you use new freshwater.
- When making the miso, is it alright if I don’t add water?
-
It’s ok and preferable if you don’t add water. But when the miso is parched or dried out, hard, or difficult to prepare, it’s better to add a little water. If you must add water, please use the remaining water from boiling the soybeans earlier. Add a small amount of water and adjust it until the soybeans are as soft as an earlobe.
Freshly prepared miso may become hard by the osmotic pressure of salt. This phenomenon is normal on the first day after preparing the miso, so even if the miso is hardened during the fermentation process, you don’t have to worry because it will ferment properly. There is no need to add water in this case.
One of the concerns in making handmade miso is that miso becomes hard. But, whether it’s soft miso or hardened miso, each has its virtue, so please try to make miso and enjoy the variety of its taste!
- Where should we keep the miso during the fermentation process?
-
Please keep the miso during the fermentation process in a cool dark place away from direct sunlight (above 15°C/59°F and below 35°C/95 °F ). Please do not store it in the fridge as aging proceeds in Summer.
A living room or a place where people comfortably live or stay is suitable for miso as it is hard to ferment in an environment where it gets below 15°C/59°F. Also, it is not suitable for storing at places where can it could reach 35°C/95°F or above.
- During the ripening/fermentation process, the container swells. Is that okay?
-
Please remove the air from the container.
If you use the “compact preparation plastic bag,” the container bag may swell when the fermentation starts. Slightly open the bag and vent the air out carefully then close it again.
- How long should we ferment the miso?
-
It is recommended to ferment the miso for about 10-12 months if prepared during Winter. If you begin preparing the miso in January (Japan), you can enjoy the finished homemade miso in October (the same year).
Meanwhile, if you start preparing the miso in Summer, please ferment for 4-5 months.
- When is the right time to eat the handmade miso?
-
It takes approx 10 months of aging before handmade miso is best to eat if prepared during Winter.
Depending on the temperature and the storage location, the result isn’t always the same. But, if you let the miso ferment until 10 months, the richness and original flavor of miso will come out nicely, and it will become miso with a balanced taste of sweetness.
The two years aged miso will have dark brown or black color as the fermentation further proceeds. This miso will have a strong smell, less sweetness, and sourness due to lactic acid fermentation. It depends on your preference, but miso with 10 to 12 months of aging is said to have the best flavor.
- When is a good time to start making miso?
-
January is best for preparing miso in Japan because miso will age from Winter to Spring, which accelerates fermentation. Then it will be ready in Autumn when the temperature cools down. However, you are free to make homemade miso whenever you want, as the taste and color will vary and have their own charms!
- Any tips when preparing homemade miso during Summer?
-
If you prepare miso in the Summer, you will not fail as long as you pay attention to these two points:
1. Do not leave the soybeans as it is after you boil them.
Bacillus natto, a natural enemy of Aspergillus oryzae (koji), becomes very easy to propagate on the soybeans after being boiled during the hot season. So do not leave the boiled soybeans for a long time. Just let it cool down for a while, and start preparing into miso immediately.
2. Do not place koji at room temperature.
Since koji is a susceptible microorganism to temperature, leaving it at room temperature for a long time in hot summer weather may cause failure to make miso. The miso prepared in summer tends to easily ferment, so the color of the miso may be darker. We recommend keeping the miso in a cool dark place if you make it in the summer.
- Can I use a different type of koji to make miso?
-
Of course. There are many variations of miso paste based on its ingredients, so you can make homemade miso with all kinds of koji. Feel free to combine/replace 1kg rice koji with other types of koji like barley koji, soybean koji, or brown rice koji.
Delicious Recipes Using Homemade Miso
Now, it’s time to make your homemade miso paste shine!
Miso paste has been highly favored by the Japanese since the old time. It is very versatile. From making miso soup, miso ramen, or miso-marinated meat or fish. You can also use miso to make dipping sauces, salad dressings, or glazes.
Check out our recommended recipes below to enjoy the delicious homemade miso to the fullest!
Find more miso soup recipes in this Miso Soup Category

Recommended Products for Making Miso
Recommended Miso Paste Products
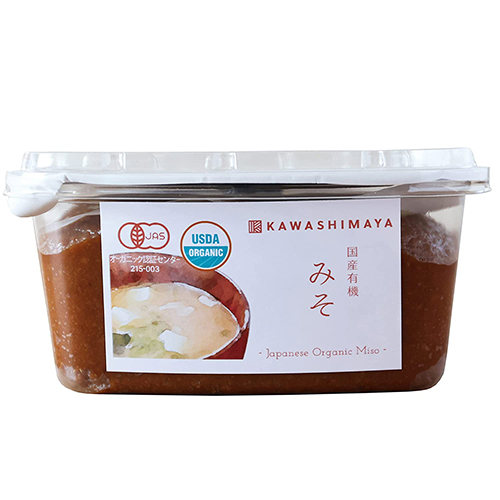
Japanese Miso Paste | USDA & JAS Organic, No MSG, Fermented Soybean with Rice Koji, Additives-Free, Made in Japan by Kawashimaya | 450g (15.8oz)
Traditional-style miso paste, naturally aged for more than 10 months. The premium Japanese miso paste for greater umami in daily recipes. Characterized by a rich and mellow flavor that a natural, old-fashioned fermentation method can only produce. USDA & JAS Organic certified, no MSG, additives-free, gluten-free, and vegan friendly. 100% Made in Japan.